
My sister came to me with this shirt and wanted me to make a tie front cardigan, like Rosalie wears in "Eclipse". If you've seen the movie, it's her outfit she is wearing when she is telling her "story" of how she became a vampire. If you haven't seen the movie, it's ok, I didn't know what my sister was talking about either. So here's what I figured out for my sister.
Use a shirt that is 1-2 sizes too big.

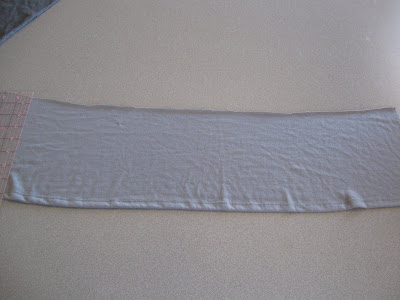
Step 1: Cut your shirt up the center.

Step 2: Cut the collar off, try and keep your cuts and even as possible. If you get funny ridges after you cut, just go back and even them out.

Step 3: Take a straight edge and use a piece of chalk to mark evenly on each side to create the opening of the cardigan.

Shirt should look like this.

Step 4: Cut where you marked with the chalk.

Step 5: Round the shirt off at the angle.

Step 6: Using a different piece of knit fabric (mine was from a hem job I did for my sister as well, yes, I am her personal seamstress) cut your fabric about 24" long. You can do it shorter, but I wanted these to hang.
Step 7: Cut your strips 2" wide. After they are cut, pull on each end of the strips to make the strips curl.

Step 8: This is a terrible picture! But make a tight zigzag stitch, like a button hole, where you want the ties to come through. My sewing machine did not like this fabric at.all.! But do the best you can. Do this on both sides. If you don't want your shirt to gather too much in the front, make your holes closer to the opening of your shirt. If you want it to gather more, make the holes farther from the opening.

Step 9: Sew your ties on and fold your edges over to run a stitch all the way around the collar and on each side of your opening.

TA DA!!! You're done! Looks super cute!

Totally easy and very fast!
this is so cute and easy! i think i have a shirt that is calling out to made into a cardigan like this. great idea!
ReplyDeletecool and easy!! Great idea!!
ReplyDeleteS.U.P.E.R. Cute! I love it and I'm totally going to try this! I hope it works out as well for me! Thank you so much for sharing!
ReplyDelete♥ Aleesha
Very cute! Never would have thought of something like this. Thanks for sharing.
ReplyDeleteI really like this. Just have to find a t shirt two sizes too big. (maybe when weight watchers starts to work I'll be converting my old T's!)
ReplyDeleteLooks FANTASTIC! Love this!
ReplyDeleteI really like this! Will have to try this out. i always find cute knit shirts on clearance, that are never my size. Thanks for sharing.
ReplyDeleteNew follower
Carole
www.frogbellysoup.blogspot.com
I love this design!! So cute!! I was thinking that putting a little square of iron on interfacing before you make your button hole might help it to go through your machine better. It's just a thought.
ReplyDeleteI am in LOVE with this! I have a t-shirt just begging to become this super cute cardigan. Thanks so much for the tute!
ReplyDeleteWhat a great idea!! Thanks so much for sharing! :)
ReplyDeleteThat is SO CUTE!!!
ReplyDeleteI have be familiar with a scarcely any of the articles on your website at this very moment, and I definitely like your line of blogging. I added it to my favorites web age muster and resolve be checking promote soon. Will check in view my orientation as well and vindicate me conscious what you think. Thanks.
ReplyDeleteGot a shirt I want to try this on - looks like you also cut the hem off the sleeves and bottom of the shirt. true? I'm also a bit confused about how the button holes and ties work....can you post a pic of this in action?? Thanks!
ReplyDeleteLOVE this!! Found you on pinterest =) Thanks for the awesome tutorial!!!
ReplyDeleteSO cute! This will be perfect to hide my post preggo belly! LOVE!
ReplyDeleteThat is really neat.
ReplyDeleteI have been looking everywhere for a cute idea to upcycle shirts, and you have created the PERFECT idea! THANK YOU!
ReplyDelete