 I love tutorials that are versatile. It's like two in one. This is one of them! You can use these steps to make a half apron or a full apron! I love both!
Let's get started!
Supplies:
*1/2-3/4 Yard of fabric for bottom layer, waistband, and ties
*1/2 for top layer and bib part
*Iron and Ironing board (Sometimes you can fudge and skip the ironing part, but with this you can't. It would look so wobbly and it would not lay right, so get ready to iron...a lot.)
*Basics- Sewing Machine, thread, pins, tape measure, rotary cutter and mat (not mandatory, but makes things go faster.)
Step 1: Let's start by cutting all your pieces out. This apron is perfect for scraps of fabric. That's exactly what I used, so my measuring was a little interesting. But you can make it work however you want. For the bottom piece: I made these for my nieces who are 8 and 6. I took their measurements of their waist and based everything off of that. Both had a waist of 25". So your bottom piece needs to be Half of that measurement+6" for a gather. Mine came out to 18.5", so I rounded it up to an even 20". Then determine the length you want. Mine was 10.5", keep in mind that you will have to hem it so give yourself your seam allowance, mine was 1/2".
The top layer needs to be smaller than the bottom. Make the top 3" shorter than the bottom layer and 1.5" shorter on the sides. So mine was a rectangle of 9"x17".
If you are making this a full apron (you can do both with this tutorial!) determine how wide and long you want yours to be. It depends on where you want the waistband to sit, if you want it more of an empire waist, then make your bib shorter, if you want the waistband to sit lower then make it longer. As you are going to fold over the top of your bib by 3", allow the extra fabric. Mine ended up being 11"x10". Don't forget your seam allowance!
Now for the ties and waistband. For the waistband you want to cut 2 pieces that are 3"x however long your measurements are. I wanted mine to be well behind the back, so it went all the way around, so with my measurements I made it 22". You can just rip your fabric for this, it saves time.
For your ties in the back, cut 2 2"x however long you want them. I like to have the girls' aprons tie in the front, so it has to be long enough to wrap around them. They ended up being 45" long.
For the necktie, cut it at 2"x 35-40"
Remember to iron all your fabric after you cut it so you start off with clean lines.
Step 2: Fold the bottom layer in half. Use a cup to trace at the corner and cut around your curved edge.


Step 3: Do the same for the top layer, fold it in half but with this one you will make a half circle. I just eyeballed it, but if you have a method you like, go with that.

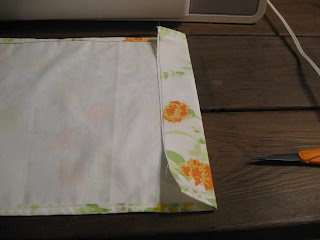
 Step 4: Now for the bib. I had to line my bib part because the fabric was too thin. Iron your sides to finish the edges. I did a half inch, then I folded the raw edge in and ironed the edge. This creates a clean hem. (If you want to make a half apron, skip this step and move down to Step 6)
 Step 5: Now fold your bib piece down 3" and iron it flat. This is going to be the place for your necktie. Stitch across the raw edge.
 Step 6: With most aprons you finish the edges before you put it all together, that's what we do next. As this is a curved edge, either use a rolled hem foot on your machine or if you're like me and couldn't find your foot without waking a child up, just go slowly and make a loose twist on the bottom. This takes some patience. Just go slow and just make sure your raw edge is folded under so you can't see it. You will have to iron your pieces after you finish to get them to lay flat as they might want to curl a bit, but it actually looks cute.
Do this with both the bottom and top layers. If you want, you can add lace trim after your hem is done.

Step 7: Make a gathered stitch on the top of your two layers. Gather both pieces to the desired length you want.
 Step 8: Fold your bottom layer, top layer and one piece of the waistband in half. Once you find the center of each piece mark it with a pin, chalk, pen, anything that will stand out for you. Lay the two layers on top of each other, with the center marks lined up. Lay your waistband on top of your two layers, center mark lined up, and pin it to your layers, right sides together. It's easier to start from the center and work your way out.


Step 9: Stitch the three pieces together. Once done, iron your waistband up, making a clean line. Continue to iron the fold of the waistband extending out to the ends.

Step 10: Find the center of your bib, by folding and marking, just like the others. Line the center with your waistband center. Pin them together and stitch along the edge of the bib. Iron flat after you make your stitch. Continue to iron the fold of the waistband extending out to the ends. (If you are making a half apron skip to next step)


Step 11: Take other piece of your waistband and place it on top of the bib on the back side of your apron. Lay it so that the wrong side is facing you. Pin it to the bib/waistband raw edge of your apron and all the way out to the ends of the front waistband and stitch. Iron your waistband up.

Step 12: Iron the waistband down, so the raw edge is pointing down, using the same seam allowance you used with the front waistband. Pin all the way across from the front waistband, over the layers on the bottom, and to the other side of the waistband. This creates a clean, professional look to your apron. Iron after you stitch them all up.
 Step 13: Sew your ties together. Fold each in half, right side together, and stitch up the raw edge. Take a safety pin and turn each inside out. Iron flat. With the waist ties, tuck one end in on each piece and stitch it closed. With the necktie finish both ends.
Step 14: Tuck in your waistband pieces and put your waist ties in the opening and pin in place. Stitch both sides closed. (If you're making a half apron, this is your last step!)


Step 15: Take a safety pin and string your necktie through the opening on your bib.

And that's it!!!!!!
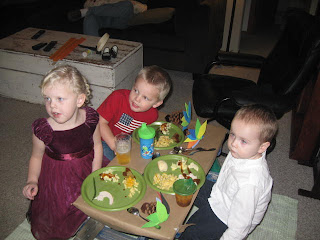
 I also made a second one for my other niece so they could have aprons together and play house. I love how they both turned out and it really will be something that they will use for a very long time!
 Just so you guys know, it has taken me all week to get this tutorial finished! Both of my kids are sick this week, I am incredibly sleep deprived, and I'm a bit sluggish because of all the things I've been staying up late to make. I'll post pictures tomorrow...hopefully, of all my creations that I've made so far. I only have a handful left to make, but they won't take me much time to do, so I am way ahead of schedule than I was last year! Hope you all are enjoying your season!


