Showing posts with label Baby Stuff. Show all posts

Tuesday, November 1, 2011

Giant Costume Post

Another year has gone by with costume making madness. This year I made a total of 4 costumes. Only one was for my family though. Let's get started with the cuteness!

Little Miss Sassy Pants decided to be Rapunzel a long time ago, so I started thinking of how to make it. I used the same format as the Versatile Shirt for the top. Just a tub with sleeves. Add some rick-rack, lace trim and some ribbon and you have a Rapunzel top. I also wanted to make her a tutu to make it extra fufu-ey! (Yes, that is a word)
I just straightened her hair (which makes her look like a teenager :-( ) and she was good to go!

Good thing I have a friend with a bridal shop as this is the dress I cut up to make the top. This dress would've fit her as is....whoever is this small is abnormal! The center piece of the top with the darker purple is from a bridesmaid alteration I did and kept the scrap fabric.
Now, my older sister conned me into making her and her husband's costumes. The only reason I agreed was because she supplied me with an endless amount of Diet Dr. Pepper and came over to help pin and iron seams and cut all the pieces out. Plus she asked me about 3 weeks in advance, which is very out of character for her as she usually calls about 3 days before she needs stuff done. They went as the Princess Bride and the Dread Pirate Roberts. Here is her hubs sporting the shirt I made. She did the sash and head piece (with fabric I had lying around).
And here is Princess Buttercup. The dress weighed about 47lbs as it was that stretchy velour stuff and was a bit of a pain to sew with as it kept shifting. Luckily I have my new machine as it took a fraction of the time to make than it would have with my other machine!
And the newest member of our family was festive as well. Here is baby Emma sporting her new little hair pretty I made for her. She is about 5 hours old in this picture. Baby and mommy are healthy and happy and I have gotten to sniff her squishy baby head a few times and it has been heavenly.

Now, I know that last year I made my son's costume too, but this year, due to all the other projects, and his particular interest in the Transformers, I got a screaming deal on his costume online and had to just buy it. We planned on making his Bumble-Bee costume out of boxes and foam, but decided that he would not be able to walk and that I just didn't have the time. He was very popular with all the little boys out there Trick or Treating. Plus, this is the only Transformer that he can actually say. So, win win.
No, I did not dress our dog up, but I had to share a nice little story with you all. Our dog decided to bust out of this joint and go on an adventure alone. On Friday night we were making pizzas and were in the midst of craziness and all of a sudden we realized that our dog was not inside. We searched everywhere and he was gone from our yard. Plus, it was cold and raining at that time as well. Trying to look for a black dog, in the dark, in the rain is almost impossible. We searched for hours, cried, called his name outside, cried some more. Then my husband decided to go look again, got the flashlight, and was going from the backyard and I heard something knock on the front door. I opened the front door and was greeted with a soaking wet, tired and cold dog that was wagging his tail so hard that his legs were shifting on the ground. We still don't know how he got out, but we are so thankful that he came home safe.
I hope you all had a safe and happy Halloween!

Tuesday, October 25, 2011

Candy Corn Hair Pretty Tutorial

Being in a festive mood, I decided to make my daughter and soon to be niece some festive hair pretties. These were super easy and fun to make!
Supplies:
*White, Orange, and Yellow fabric cut/torn into strips
*Felt or fleece for the body
*Sewing Machine
*Needle and Thread

Step 1: Cut 2 fleece or felt into a rounded triangle, one for the body and the other to hold your hair clip. I did two sizes. One for my 4 year old and on for a baby (That should be out any minute.. like, she's in the hospital on the OR table.)

Step 2: Cut/tear your fabric into strips of the same width. They don't have to be the same length, just need to be long enough to get ruffled and fit on your triangle. I made mine freakishly long, because it's easier to cut things off than to not have enough.
Step 3: Take your needle and thread and do a gathering stitch down the center of your strips. Do it to all three strips.

Step 4: Place them onto your triangle, overlapping the fabrics. You will pin these down and stitch on the top of the orange strip and then the yellow. This holds your fabric down so there aren't any holes.
This is before I pinned them and stitched them onto the triangle.
Step 5: After you have stitched your fabric strips down, flip your triangle over and stitch around your triangle, getting as close to the edge as you can get.
Step 6: Trim your extra fabric all the way around the edges. Then glue the second triangle you cut out onto the back, adding your alligator clip.

Add a little bow on the top and clip it onto your hair! I mean your kids' hair.I also made this little candy corn dress for baby Emma to go with the hair pretty. She has to be festive looking for her first Halloween!

Have Fun!

Monday, October 24, 2011

Preparing for Baby

Not mine! No no! That ship has sailed. But my sister-in-law, my husband's only sister, is having baby #2 tomorrow. Oh how I love babies. I cannot wait to sniff her little head. I've been working on this project for a few months now. I know, shouldn't have taken that long, but that's what happens when you have so many projects and alterations to do.

Apparently I'm the car seat lady. Which I'm ok with. Especially when I have such great fabrics to work with and a new machine to use! This one is from a vintage sheet set that my sister-in-law has had for a few years, but never knew what to do with it. Must have been divine intervention that she didn't use it in all that time because she was destined to have a little girl!
The brown is the fabric that I bought to recover those wing back chairs I got last summer. I never even got a chance to do that project because when we moved our garage around the chairs had become home to more spiders than I could even count, so we took them to the dump. I don't do bugs.
I just love how this turned out and to be honest I was a little emotional when I finished it. This is the car seat that brought home both of my babies and now it gets to bring home one last bundle of joy. I will post pictures when I can of baby Emma!

Tuesday, July 5, 2011

Baby Bootie Crazy and a Giveaway!

So today is my sister-in-law's baby shower. This go round she is having a girl, which will help as my daughter is the only granddaughter on that side of the family, so she is SPOILED ROTTEN!!!! Lol But I guess there could be worse things she could be. One of the things I am making for baby is a carseat cover, which is seeming like the norm for me to offer, even though I am not super fond of doing them. Hmmmm. With all the things that have been going on in this house the carseat has not even been started, let alone finished. So I made baby booties...and I am completely addicted! I was addicted a few years ago, but stopped as I got busy, but now! Wow, these are so wonderful!

These are the Stardust pattern. I like these, but my fabric choice made these a pain to deal with and took forever to finish. I used some leftover cream fleece for the inside and an old pair of jeans for the outside. Needless to say, these needed a heavy duty needle and were just not fun to make. Lol But that is my fault.
These on the other hand are amazing! I used the Mila Baby Shoe Pattern and let me just say that I could make these all day long! They came together so fast, turned out so cute, the possibilities of fabric and trim are endless and I would like to make them in my size. I highly recommend this pattern, especially if you are new to sewing! It was very simple to make, the instructions are very straight forward and I made these in less than an hour! It was awesome! The fabric I used on these were a pair of old gray corduroys that I had and the inside was cotton shirt I had gotten bleach on. I love making gifts that are absolutely free!!! Makes my husband happy when I am able to give things that don't cost anything to make.

On a completely different note, I want you all to head over to Craft Projects and take a little survey! It's for craft bloggers and it literally takes 5 minutes to do and it will be fun to see the results of the survey and see where all the bloggers are from and how many are in the same category! I don't know about you, but I always like to see survey results on things like this. I think it's fun! So go over and do it! If you do take the survey, leave me a comment and there might be a little GIVEAWAY that comes out of it!

Sunday, September 26, 2010

Close Call for the Car Seat Cover

As I mentioned before about finishing a project but I just didn't even want to look at it. This car seat cover was so incredibly hard for me! Not sure what made this one so much more difficult, but it was. I wanted to light it on fire a few times, and I actually did once, but not on purpose. :)

I guess you could call this a refashion as the pink patterned fabric was a table cloth. It was so far from being my taste that I just couldn't be excited about making it. Maybe that's selfish, but the pattern hurt my brain, literally. But my friend loved it and almost cried when she saw it. I enclosed a little note saying, "I hope you like it, but just so you know, you better only have girls, because I don't ever want to do this again!" Lol I went through 8 needles on this project. Two of those needles happened on the canopy alone and within a 10 minute time frame. I pounded my fist on the table, which in turn woke my kids up.
Now as for the lighting it on fire, it was mostly because I was so frustrated with my work! However, the actual fire happened on this part. The blue band in the center is some satin ribbon I had on hand. When I made the strap holes I had to cut a little slit and to ensure that it wouldn't fray I took a match to the edges. Yeah, it caught on fire, but I was very fast with my ninja skills and blew it out. I guess it's special in the fact that it's one of the only car seats that was lit on fire.
The canopy was the fastest part on the project, but it still took a few hours to finish. All of these pictures were taken at 2:00am, hence the horrible quality. I told my husband that I was not going to go to bed without finishing this thing first. I did a little victory dance and posted on Facebook that if anyone wanted me to do a car seat cover in the near future, the answer was a big HECK NO!!!!

Now onto working on some fun refashion projects! Hope you all had a great weekend!

Saturday, August 7, 2010

Baby Shower Gift

I know so many people that are pregnant right now! In fact, in the last 48 hours, I know 3 babies that were born! Crazy right? Well, I have this little friend (and I say little because she is like a stick figure) who is having a little girl in October. In fact, this baby will start to come and play at my house when mommy goes back to work in January (so three kids 3 and under, I can do this... I think!). But her baby shower was last weekend and I just had to share what I made for this little bundle.
The hat is from this tutorial and I am obsessed with it! I think I've made at least 5 already. And the booties are kind of my own creation. I found a few patterns, but they made them a funny shape, so I just kind of figured out my own little pattern, and again, I'm obsessed with these as well! There is nothing sweeter in the world than little baby feet, so when I make these I just can't wait to see the little feet that will be in them.
I have also been experimenting with the "Distressing Ink." I should have done some test runs with it before stamping on the letter, but oh well. Looks ok for a babies room.

What have you been working on lately?

Tuesday, May 25, 2010

Baby Shower Gift

What a week. And not in a good way. Sorry for the absence. Its probably a good thing as I would just sit and rant about every bad thing that is going on and then sit and eat candy all day.

Instead of boring you with all that, here is my little baby shower gift for my dear friend Suzie from Suzie Homemaker We are friends from school/church when we were younger and she is having another boy soon. I was unable to go to her shower as I hurt my back (yet another fun thing that happened), so she gets to see the pictures before I mail them to her in Utah.

Have you heard of the Cricut?! Well, sadly, I had no idea what it was until my mom informed me that she bought one for my sister and I to share. I wasn't super excited about it, because I was confused as to what it does, but now... WHERE HAS IT BEEN ALL MY LIFE?!!!!! It cuts everything! Including fabric! Did you know this?! Well, here is a super easy idea for your next shower when you are short on cash and time.

All you need is a package of plain onesies, scraps of fabric (mine came from the car seat! Lol), your favorite iron on adhesive (mine is Heat 'n' Bond) and thread.

Iron your fabric to your iron on adhesive, cut out the pattern you want, iron it on, and hand stitch or use your sewing machine and stitch around your fabric applique! That's it! I hand stitched these, just because they look more boy-ish that way to me.
Love baby feet!
My kids call this the Pirate one.

This is what we call our son and I have a feeling that Suzie's little boys are "Bubba Boys" too.
There you have it! Easy, inexpensive and uber cute! Enjoy!

Friday, November 20, 2009

Just Had to Share This!

I took this yesterday and it just cracked me up! This is my 10 month old little guy during lunch, right before nap. He was so dang tired, but was still shoveling food in his mouth! Don't mind the cough at the end though, it is getting better. Yup, my kids are sick once again.
**Update: Sorry, the video didn't load correctly when I first posted it. Sorry!

Thursday, August 27, 2009

Gift for Under $5.00 Part III

I have really enjoyed making all these gifts as of late, not only because I love the sense of accomplishment of seeing a finished product, but because I know that I made something for very little (if not nothing) and it is special for that one person. Here is a fun baby gift idea. This is for the baby shower I am going to this evening and I figure that my reader that it is for won't be checking her blogs today as she will be driving up here to attend her shower.

So here they are:

The blocks are super easy, just cut out 6- 6" squares, sew 4 squares into a line and then add the extra two squares on the top to form a "T", then just sew the sides together. I used some extra flannel and the top squares are some denim that I was going to make something else out of, but never finished.


Don't you just love these?! I used the same denim as the squares for the outside and some extra fleece I had for the lining. I got the pattern from this site. They were very easy to make as well and the only thing I had to buy on this was the elastic which was about $1. I did the applique on the top and hand stitched around the dinosaur and its back. It was very east and I just love how warm then are.

So there you have it. Another installment of "Gifts for Under $5.00!" If you have any questions on how to make these, please let me know. I will be more than happy to assist your crafty needs!
DIY Day @ ASPTL

Wednesday, August 19, 2009

Gift for Under $5.00 Part II

As I have said in previous posts, this is the month of birthdays, weddings and BABY SHOWERS!!! I will have baby things next week (as some of the gifts are for one of my readers and I don't want to spoil the surprise.) But here is a creation that is for my nephew that turns 2 this week! He's such a big boy and loves to do everything his daddy does, and with his daddy being a roofer, I figured I would have to make my nephew a tool belt like his dad's.

Here's what I used:

Nylon strap from a back pack we never use with a clip on it
Black Fabric

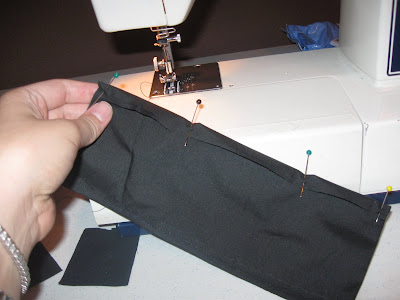
I first cut the belt to fit and sewed up the sides. Tip: Make sure you have a Heavy Duty needle or your sewing machine will hate you, which is not what I had.

Then I cut a strip of fabric, about 1" in width (the belt was 1 1/2") and I sewed up the sides and then stitched it onto the belt. I used my finger as a guide for each loop on the utility part of the belt.

I made little seams to make 4 loops.

I then made the pocket for the other side. Now this one was a little tricky, at least for me and my very limited sewing skills. But I cut a long piece of fabric about 4 1/2"X6 1/2". I stitched up the sides. Now I don't have pictures of this as my sewing machine was in shock from the nylon, but I took two squares and stitched them onto the top of the fabric to make a big "T". Then I stitched each side of the little squares onto the long strip to form the pocket. I then wrapped the strip and its pocket that was turned inside as to make the little pouch and stitched on the top and bottom to secure the fabric.

I then wrapped the strip and its pocket that was turned inside as to make the little pouch and stitched on the top and bottom to secure the fabric. Now as I was doing this on the super cheap, I didn't do this step, but you might want to put something inside to make the pocket a little more stiff. I didn't have anything that would work, so I didn't do it, but some stiff interfacing or some cardboard would work great.

Now for the "Hammer Loop". I just took a small scrap of fabric and made a loop and stitched it onto the nylon, right next to the utility loops.

There you have it folks! A child sized tool belt. You can also add another pocket on the back or whatever you want! As this little guy is not super big, I was limited as to what I could put on there, but just use your imagination. I also had to Google pictures of tool belts to get my inspiration. How much did this gift cost me? NOTHING!!! All of the material were things I already had, at least this part of it. There is a small set of wooden tools that the grandma is providing for this gift, and it will work very well!
DIY Day @ ASPTL

Monday, August 10, 2009

Homemade Baby Food Tutorial

Now, just so you all know, I have been working on this post for about a week. I didn't want to give bad information and have someone come back and sue me for making their child sick. So let me just say this now: I am NOT a certified nutritionist, I have NO background in the medical field and I am NOT an expert on fruits and veggies. I am just a stay at home mom, trying to save a few dollars, and feed my family healthy meals on an extremely tight budget. There, now that I have cleared the air, take my tips, do your research as I did, consult your pediatrician as I did, talk to your local produce guy as I did and just use your "Mommy Instincts", you know the little voice in your head that says, this may not work for me or my child.

Now this tutorial is pretty basic, but I did two different foods. I made pears and carrots. With summer here, the cost of produce is extremely cheap as everything is in season right now. We were spending anywhere from $40-$80 a month on baby food alone for our little man, (he eats like a horse! I'm a little nervous about what he's going to be like as a teenager!) So all of the food that I have made, I have done so for under $20! I have enough food to last us until the end of September or longer. Most of the food I have made were grown in my mother-in-law's garden, so those were free.

Pears:

As pears are a fairly tender fruit there was really no preparation with them. Just wash and cut them into chunks and put in the food processor (if you are lucky) or blender (if you aren't.) The blender works fine though, just their little motors give out fast if you put too much in at a time.
*Wash Your Fruit Thoroughly

*Cut into Chunks
*Cut out the centers as they can be tough where the seeds are
*Put in your blender/food processor 2 cups at a time

*Add formula or breast milk an ounce at a time and blend until it is the desired consistency (For Stage 1 babies, you will want it pretty soupy, but for Stage 2 babies, you will want it not as soupy, just work with it and you can always add rice cereal to it when you are preparing for baby to eat to thicken it up.)

*Pour food into ice cube trays, cover and freeze! Its that easy!

(This is 3 pears worth!)

This method works well with soft fruits such as pears, bananas, peaches, plums, blueberries, strawberries (pretty much all the berries, but you don't want to do straight berries as it will be too acidic for babies tummies and might cause issues... the messy kind!)

You don't have to add any kind of sweetener as it is not recommended. Never use things such as molasses or honey as there is this not so fun thing called botulism and babies can get it from both honey and molasses. If your fruit is a little tart, like the peaches, add just a very small amount of baby apple juice to your mix. With applesauce I added a little bit of sugar and cinnamon but not enough for it to cause any problems, but that is not a good idea for Stage 1 babies. As my son is 7 months now, he is ok for a little bit of spices. Check with your pediatrician to see what they recommend for sweetener, especially if your baby has a sensitive stomach.

Carrots:

Rule of thumb: Anything that is crunchy, it needs to be steamed first. The main ones are carrots and apples. I peel my carrots as the outside layer is what makes them a little bitter, but you really don't have to. We got a 10lb bag of carrots at Costco for $3.99!! I have enough carrot baby food to last for months, but my boy would be orange if I let him eat it every day.
*Peel Your Carrots

*Chop into Chunks
*Put in a pot of enough water to just barely cover your carrots.
*Put on Med to Low heat (this way if you have to take care of something else you aren't over cooking them if you are gone for a little while.) Cooking time will vary! It depends on how much is in the pot, what temp you put it on, how much water is in there, lots of things. So just keep an eye on it, once the veggie is tender they are ready.
*Take out, put in blender/food processor 2 cups at a time
*Add an ounce of formula or breast milk at a time until it is the right consistency.
*Put in ice cube trays and cover to freeze.

(This is not even half of the 10lb bag made up! 5 full ice cube trays worth!)

How to Reheat:
1 Cube = 1 Serving for Stage 1 Babies. 2 Cubes= 1 Serving for Stage 2 Babies. Now everything that I read said not to microwave when reheating your food, but honestly, when your child is screaming like he is wasting away, its really your only option. Just make sure to stir a lot. Now again, cooking time will vary as some of you might have a better microwave than I do, but I start off with putting my cubes in microwave safe bowls and heating them for 1 minute, as I do 2 cubes in each bowl it takes a little longer, with Stage 1 babies you will want to start with 30 seconds and then go in 20 second increments after that, stirring constantly. After my one minute I stir it, the fruit usually takes less time to cook so I stir them both and put them in for another 20 seconds. The fruit is done but the veggies need more time, so I do another 20 seconds. Play with it, make sure that it isn't too hot. If it is, add a little cool water to your bowl and a little cereal to thicken it up again. Remember to stir constantly and again, don't over cook because if you scorch your food it will lose all nutrients, so heat it slowly.

Try different variations, we mixed the pears and bananas as my son decided he doesn't like bananas anymore, but he loves them now!

Tips:
*Don't add butter to your mix, your baby cannot process extra fats like that, and your food doesn't need it.
*Never give unripe fruit or veggies. If your bananas are green, wait a few days. If you are not sure about how ripe your produce is, make friends with your produce guy, mine's name is Joe.
*If your baby is refusing to drink formula/breast milk, add a little extra in with the food.
*Introduce a new food every 3 days to make sure your babies stomach doesn't react to what you are feeding him. (That was from our pediatrician.)
*Do your research. I used every source I could before doing this. Yes, my motivation was to save money, but I didn't want to be giving my child anything that would hurt him. I talked to our pediatrician extensively on this and she told me it was actually better to make the food than to buy it as there are no preservatives.
*Use frozen veggies over canned veggies. They are better for you and not packed with preservatives and water.
*You don't have to go organic, but it is a good idea. If you trust your produce section and they have locally grown stuff then go with that.

I hope this helps and have fun with it. My little boy just loves most of the foods I have made for him. We have a stock pile of squash/zucchini, pears, apples, peaches, green beans, peas, carrots and bananas. It may take a little more time, but knowing that he is eating fresh stuff makes me feel better. Plus, he has always had a very sensitive stomach and gets constipated easily (I know, T.M.I.) but now, he has no issues at all. Makes me happy. And he is happier too! See~


DIY Day @ ASPTL

LinkWithin

Related Posts Plugin for WordPress, Blogger...